The ultrasonic sensor helps measure distances. In this blog post, we’re going to talk about how to connect ultrasonic sensors with Arduino. By the time you finish reading, you will have gained knowledge about the HC-04 ultrasonic sensor module, its utilization in IoT (Internet of Things) applications, the process of connecting HC-04 to an Arduino Uno, understanding the sensor’s functionality, how to combine the sensor with Arduino, and discovering additional intriguing details. Discover how the use of an ultrasonic sensor in robotics can revolutionize navigation and obstacle avoidance in our complete blog.
Ultrasonic Sensor – A Quick Start Guide for Beginners is the perfect introduction to these handy devices. This guide covers everything from how ultrasonic sensors work to practical tips for using them in your projects. Whether you’re a beginner or just looking to refresh your knowledge, this guide has you covered. Start measuring distances and detecting objects with ease using ultrasonic sensors today!
What is Ultrasonic Sensor
HC-SR04 stands for High-Conductance ultrasonic sensor, which consists of a transmitter and receiver. The sensor measures how far things are without touching them, and it uses sound waves to get the measurements right. It can work well when things are between two to four centimeters away. Just like other tools that measure distances, this sensor doesn’t harm objects. So, it’s good for things that are around two to four centimeters away.
The HC-SR04 emits ultrasonic sounds that are inaudible to humans, aiding in distance measurement and object positioning. The sensor can feel things within a specific area. To get it to function, you need to lift the Trig pin while keeping the Echo pin down for roughly 10 seconds.

The ultrasonic sensor can tell you how far things are, even if they’re as distant as 13 feet. It’s really cheap and easy to use, which is great for robots that run on batteries. This thing looks like the eyes of Wall-E the Robot. It sends out sounds you can’t hear, and these sounds are like 40,000 little vibrations per second. The farther away things are, the quieter the sounds get. Depending on how far stuff is, you can use this sensor for all sorts of things. You can also study how the sensor works to get what it does.
Every time the wave reflects, the HC-SR04 produces a pulse. The time between the transmitted wave and the reflected signal is proportional to the distance, and the longer the time, the greater the distance. The sensor can determine the distance between the transmitter and the object when this pulse is high. It is an excellent tool for robot obstacle avoidance and path-finding applications. This is the ultrasonic sensor definition.
How Ultrasonic Sensor Works
This technology detects objects by measuring the sound they produce. These sensors can detect levels and distances. However, some factors affect their performance. When designing ultrasonic sensors, it’s essential to consider factors such as the speed of sound through air and elements like humidity, temperature, and air pressure.

To make this sensor work well, the thing you’re trying to sense needs to bounce back the sound waves. The sensor should be facing straight at the thing, and it’s best if the angle is really small, like less than 3 degrees. If the thing is bumpy, the angle can change and mess up the results. So, pick something smooth. To optimize the performance of the ultrasonic sensor, consider its power source, connection method, the instructions you provide, and the desired operating range.
A typical ultrasonic sensor emits a high-frequency sound pulse that propagates through air. Once the sound reaches the object, it bounces off and returns to the sensor. The sound pulse’s travel time between the transmitter and the receiver determines the distance, utilizing the principle of measurement known as transit time measurement. Additionally, this principle plays a crucial role in accurately assessing distances in various applications. This method is powerful and has many purposes. Compared to other modules, the working of the ultrasonic sensor is notably superior.
The ultrasonic sensor module is a circuit with four pins. To detect the transmitted signal, hold the Trig pin high for about 10 seconds. On the other hand, the echo pin functions as the output pin. When the reflected signal arrives, it causes an output pulse, which the system converts into an electrical signal. The system then passes this signal on to a signal processing system.
Ultrasonic Pulse Velocity Test for Concrete
An ultrasonic pulse velocity (UPV) test is a safe method for examining the strength of concrete and rocks. This test provides valuable insights into their properties and quality. By sending rapid sound waves through the material, the UPV test determines how quickly they travel, offering valuable information about their structural integrity. Additionally, it helps us understand the strength of these materials, contributing to better construction practices.

In this test, we pass a pulse of ultrasonic waves through the cement we want to check. We measure how long it takes for the pulse to move through the material. Higher speeds demonstrate great quality and progression of the material, while slower speeds might show concrete with many breaks or voids.
The Ultrasonic testing equipment has a circuit that makes quick pulses. This circuit creates pulses and sends them to a part that changes them into vibrations you can’t hear. These vibrations are pretty fast, around 40 kHz to 50 kHz. Another part of the equipment catches these signals.
How Ultrasonic Sensor Works with an Arduino
Discover the fascinating collaboration between ultrasonic Sensors and Arduinos in measuring distances using sound waves. As the sensor emits sound, it diligently tracks its return time and calculates the round-trip duration of the wave. This calculated gap between emission and reception time precisely determines the object’s distance from the sensor. To effectively integrate an ultrasonic sensor with Arduino, it is essential to have a solid understanding of the Arduino Uno R3.
The HC-SR04 ultrasonic sensor uses four pins to transmit and receive sound waves. You connect these pins to an Arduino UNO or the original board. The Trig pin sends the sound waves, while the Echo pin receives them. You can utilize the serial monitor to observe the sensor readings. If the distance is accurate, the sensor will transmit a signal back to the Arduino.

The ultrasonic sensor with Arduino reports the distance to an object up to 13 feet away. A battery powers it, and it is easy to interface with. Its appearance resembles the eyes of a Wall-E robot. The speed of sound in water is 4.3 times faster than in air. Depending on the distance, you can position the sensor near the bottom of a body of water.
The HC SR04 ultrasonic sensor, a compact device compatible with Arduino, is designed to measure distance. Its operational concept resembles SONAR, a technology used by ships for underwater navigation. The sensor calculates distance by emitting and detecting sound waves. First, it emits sound waves and then captures the returning waves. The transmitter pin is responsible for emitting the sound waves, while the receiver pin is connected to the circuit ground. Additionally, it’s important to note that the sensor is quite sensitive, so it’s crucial to handle it with care during use.
What Can an Ultrasonic Sensor Detect?
An ultrasonic sensor is a versatile device capable of detecting various objects and materials. One of its primary functions is proximity sensing, where it can detect the presence of objects in its vicinity without physical contact. This makes it ideal for applications where non-intrusive detection is required, such as in security systems or automatic doors. Additionally, ultrasonic sensors are commonly used for distance measurement. By emitting ultrasonic pulses and measuring the time it takes for the echoes to return, the sensor can accurately determine the distance to objects, walls, or obstacles in its path. This makes it useful for applications like parking assistance systems in cars or robots that need to navigate around obstacles.

Furthermore, ultrasonic sensors are effective at detecting liquid levels. They can measure the distance to the surface of a liquid, making them valuable in industries where monitoring liquid levels is crucial, such as in tanks or reservoirs. Moreover, these sensors can detect transparent objects, which can be challenging for other types of sensors. This capability makes them useful in applications where transparent materials need to be detected, like in glass manufacturing or quality control processes. Overall, the ability of ultrasonic sensors to detect a wide range of materials and surfaces makes them indispensable in various industries and applications.
Is Ultrasonic Sensor Waterproof?
If you’re buying an ultrasonic sensing system, it’s important to know if your ultrasonic sensor is waterproof. Thankfully, most ultrasonic sensors are. This article will explain how they work and what you should look for when purchasing one. The waterproof ultrasonic sensor costs a bit more than a normal one. Read on to discover whether your sensor is waterproof and what to look for in a waterproof ultrasonic sensor. After all, the more information you have about a product, the better equipped you’ll be to make a good purchase.

A waterproof ultrasonic sensor uses a single ultrasonic transducer, both the transmitter and the receiver. These sensors work best in accessible and low-risk environments. This makes ultrasonic sensors great for outdoor projects and industrial settings. You can find waterproof sensors that have a wide operating angle. The JSN-SR04T model is one example.
The water resistance of your ultrasonic sensor depends on how you plan to use it. It can sense things by feeling their surface. If you want to use it in industries, it’s a good idea to get a waterproof one. You can accomplish this by either purchasing a sensor with built-in waterproofing or ensuring that the product you select has a waterproof label.
The waterproof ultrasonic sensor offers a solution to this problem. The only downside to this product is its limited distance and range. If this is correct, it’s not a true waterproof ultrasonic sensor. This device is only useful for measuring distances up to a certain range. You should also make sure your sensor can work with liquids and slurries.
How to Mount Ultrasonic Sensor on Servo Motor
You need to know how to mount an ultrasonic sensor on a servo motor. All you need is four wires, but you can use one if you have only two. You can use a cable tie to hold the servo motor and sensor wires to a servo stand. You need to connect the SG90 servo motor with ultrasonic sensor using the male-to-female jumper wire. Once you have completed this step, you can mount the ultrasonic sensor with a servo motor.

Once you have everything you need, you can attach the sensor to a servo motor. To do this, you’ll need a special bracket for the sensor. You can find one to buy on the Internet. But if you want, you can make one yourself. You need a servo motor and a certain kind of cable. The sensors have one type of connector, so make sure to choose the right kind of bracket that works with the servo motor.
The ultrasonic sensor mounting bracket comes with Velcro dots to secure the servo. Since the bracket permits angle adjustments, it shouldn’t pose significant complexity for a beginner. Nevertheless, if you possess knowledge of mounting servos and ultrasonic sensors, you can leverage this guide to initiate your project. You can also add a sounder to the Arduino to make the alarm more audible.
Ultrasonic Sensor Application
Ultrasonic sensors find a wide range of applications across various industries due to their ability to measure distance accurately and reliably. Here are some common applications:
- Parking Assistance: Cars use ultrasonic sensors for parking assistance. They help drivers determine the distance between their vehicle and obstacles, aiding in parking in tight spaces.
- Object Detection: These sensors detect the presence or absence of objects in robotics and automation. They are also used in conveyor systems, assembly lines, and packaging industries.
- Liquid Level Measurement: Ultrasonic sensors can measure the level of liquids in tanks, such as those used in industrial processes or fuel tanks.
- Distance Measurement: They measure distances in various applications, such as industrial automation, security systems, and traffic monitoring.
- Obstacle Avoidance: Ultrasonic sensors are used in autonomous robots and drones to avoid obstacles and navigate safely in their environment.
- Collision Avoidance: In automotive applications, ultrasonic sensors are used for collision avoidance systems to detect obstacles and warn the driver or trigger automatic braking.
- Proximity Sensing: These sensors are used for proximity sensing in smartphones, touchless faucets, and automatic doors.
- Flow Measurement: Ultrasonic sensors can be used to measure the flow rate of liquids in pipes.
- Presence Detection: They are used in security systems to detect the presence of intruders or unauthorized persons in restricted areas.
- Medical Imaging: In the medical field, ultrasonic sensors are used in imaging techniques like ultrasound to visualize internal body structures.

These applications highlight the versatility and importance of ultrasonic sensors in driving technological advancements across industries. Their ability to enable precise measurements, enhance safety, and improve efficiency underscores their integral role in shaping the future of automation, robotics, healthcare, and more.
Ultrasonic Sensor HC SR04 Module
The HC-SR04 ultrasonic sensor module is a versatile and cost-effective solution for distance sensing applications. This module utilizes ultrasonic waves to accurately measure distances from obstacles, making it ideal for use in robotics, automation, and security systems.
The HC-SR04 module features a compact design and easy-to-use interface, making it suitable for both beginners and experienced users. It operates on a principle similar to sonar, where an ultrasonic pulse is transmitted, and the time taken for the pulse to return is used to calculate the distance to the target.
With a range of 2cm to 400cm and an accuracy of up to 3mm, the HC-SR04 sensor module provides reliable and precise distance measurements. It is equipped with four pins for easy connection to microcontrollers such as Arduino, making it a popular choice among hobbyists and professionals alike.
Overall, the HC-SR04 ultrasonic sensor module is an excellent choice for applications requiring accurate and reliable distance sensing. Its affordability, ease of use, and wide range of applications make it a valuable addition to any project requiring distance measurement.

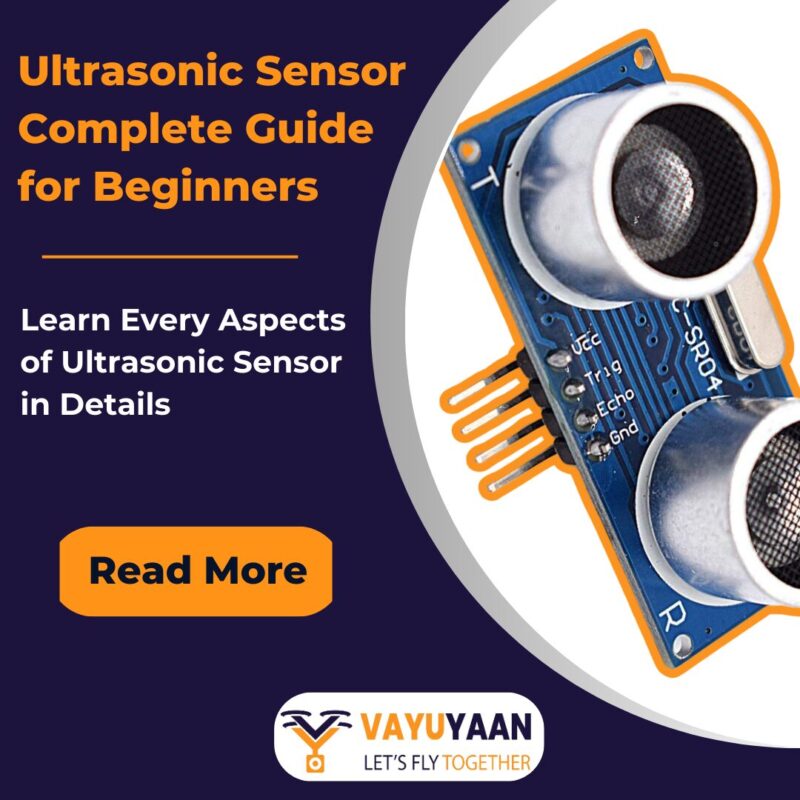
HC-04 Pinout
The HC-SR04 ultrasonic sensor module typically has four pins:
- VCC: This pin is connected to the positive terminal of the power supply (usually 5V).
- Trig (Trigger): This pin is used to trigger the ultrasonic pulse. To start the measurement, a HIGH pulse (5V) of 10μs duration is applied.
- Echo: This pin receives the echo pulse. The pulse width is proportional to the distance of the object detected by the sensor.
- GND: This pin is connected to the ground of the circuit.
Arduino Code for Ultrasonic Sensor
You’ve come to the right place if you’re looking for an Arduino code for ultrasonic sensors. This library aims to make access to ultrasonic distance measurements easy for everyone. However, with a large amount of online information, navigating through the code can be challenging. The first step in creating a useful ultrasonic sensor is to select a sensor. The HC-SR04 is a popular option. You can also code ultrasonic sensors with Arduino.

To use an ultrasonic sensor with Arduino, you must first connect it to an Arduino microcontroller. You can use an Arduino UNO R3 or an Arduino Pro Mini. This ultrasonic sensor has four pins: the Trig pin, the Echo pin, and the output pin. This sensor converts its outputs to distance using the time delay. Using this information, you can calculate the distance to an object. Since the speed of sound is 343 meters per second, the distance measurements you get are accurate.
To connect the sensor to your computer, you’ll need a USB A to B cable and a USB port. Then, you need to choose the Arduino UNO as your board and the Arduino UNO as the COM port. You can locate these settings under Tools > Board and Port in Arduino. Afterward, the serial monitor window will appear, allowing you to input the code to retrieve your sensor readings. While using the Arduino code for an ultrasonic sensor, check the syntax and code for zero errors. You can also check the source for the proper Arduino Code for an ultrasonic sensor. Within this section, you can access and copy the Arduino Code for the ultrasonic sensor from the document provided below. Download the document containing the code for your reference.
Ultrasonic Sensor and Servo Motor Arduino Code
An ultrasonic sensor and servo motor are simple yet effective ways to control an object. These sensors use sound waves to detect movement and send an elapsed time signal to the Arduino board. A servo motor consists of a suitable motor coupled to a sensor for position feedback, designed for precise motion control. You can purchase these sensors in electronic shops or online at Vayuyaan. You can also control the servo with an ultrasonic sensor Arduino.

To control the speed of a servo motor, you must change the step size and rotation speed. These two variables will affect the number of ultrasonic sensor reads per servo position update. Increasing the step size will decrease the number of sensor updates per servo sweep. Also, you can adjust the microsecond value, which will affect the number of ultrasonic sensor reads per servo sweep.
To mount an ultrasonic sensor to an Arduino, you must use a bracket. Additionally, you will need a TowerPro SG90 servo motor and a bracket for it. The bracket comes with “D”-shaped washers, which will hold the sensor in place. If the sensor is tilted or looking to the left, you may need to adjust the position of the servo horn screw. It’s important to note that you should never connect the sensor mounting screws to the center of the servo sweep. Also, you can adjust the sensor position later when the Arduino program is running. You can download a doc file for the ultrasonic sensor and servo motor Arduino code using the button below.
Ultrasonic Sensor Datasheet
The Ultrasonic Sensor Datasheet provides comprehensive information about the ultrasonic sensor, including technical specifications, operating principles, and applications. It details the sensor’s measurement range, accuracy, and resolution, as well as its power requirements and communication interface. The datasheet also outlines the sensor’s physical dimensions, mounting options, and environmental conditions for proper operation. Additionally, it describes the sensor’s compatibility with various microcontrollers and programming languages, making it a versatile choice for a wide range of projects. If you searched for an ultrasonic sensor datasheet but couldn’t find one, you can download the datasheet of the ultrasonic sensor by clicking the button below.
How much does Ultrasonic Sensor Cost?
The cost of an ultrasonic sensor can vary depending on the brand, model, and features. Generally, basic ultrasonic sensors designed for simple distance measurement can be found for as low as $5 to $20. However, more advanced ultrasonic sensors with additional features such as higher accuracy, longer range, or advanced connectivity options can cost anywhere from $20 to $100 or more. It’s important to consider the specific requirements of your project and choose an ultrasonic sensor that meets those needs while staying within your budget. The price of an ultrasonic sensor differs from website to website. The cost of the ultrasonic sensor on Vayuyaan is lower than on other sites.
Where to Buy Ultrasonic Sensor HC SR04
You can purchase the HC-SR04 ultrasonic sensor from Vayuyaan, an online retailer that specializes in electronic components and modules. Vayuyaan offers a wide range of products for hobbyists, makers, and electronic enthusiasts. They provide reliable products and a convenient shopping experience, making them a trusted source for your electronics needs.